Alfred is a fantastic application that I could simply not live without. It’s the first application that I install on a fresh copy of OS X. I’m going to show you how to set it up to optimize your productivity with the application.
Alfred saves you time when you search for files online or on your Mac. Be more productive with hotkeys, keywords and file actions at your fingertips. – Alfred Website
First Things First, Install It
Head over to http://alfredapp.com and install the application. It’s free, but you should buy the Powerpack , which adds several essential features to Alfred, such as:
- Create and Import Workflows
- Clipboard & Snippets
- iTunes Controls
- Theming
- File Navigation & Result Actions
- Plus many more features…
A large portion of this setup article will cover features that are only included as part of the Powerpack, so in order to get the most out of Alfred (and this article), I highly recommend you buy it.
Bringing up Alfred
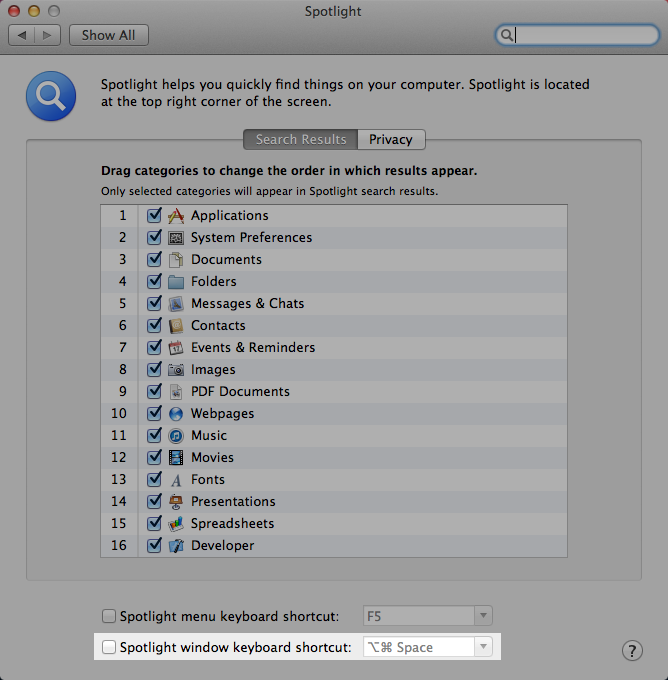
Since Alfred is a far more advanced version of OS X’s Spotlight, I simply take
over the keyboard command that Spotlight uses by default; cmd+space. To do
this, open up System Preferences > Spotlight, and change (or uncheck) the
Spotlight window keyboard shortcut option to another keyboard shortcut.
 The System Preferences Spotlight window.
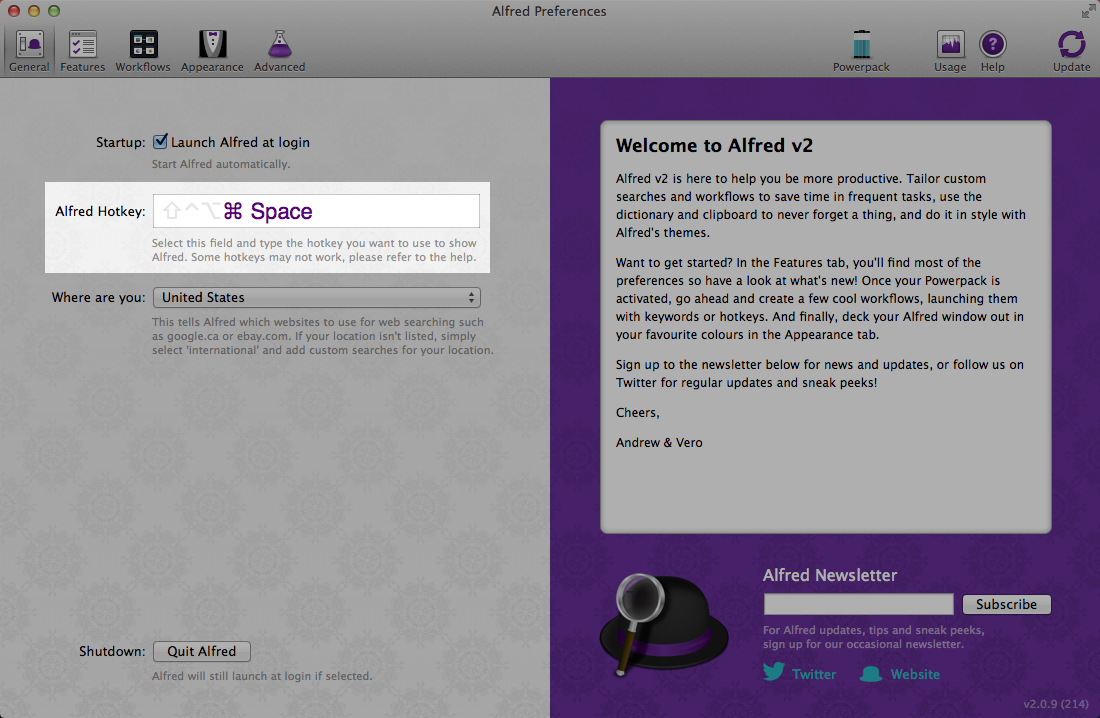
Now, in Alfred, open up the preferences (click the cog at the top right or hit
cmd+,) and change the Alfred Hotkey to cmd+space (or whichever keyboard
shortcut you prefer).
 Alfred System Preferences window.
Simplifying Alfred
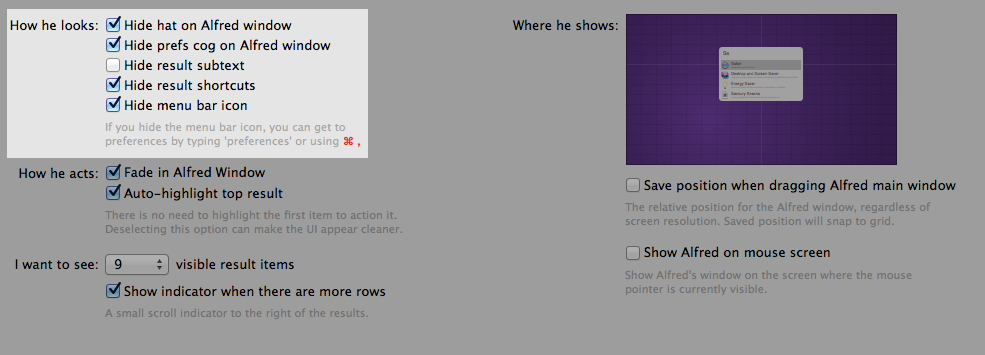
The first thing that I like to do with the Alfred window is remove the settings
cog (instead, bring up the settings with cmd+,), and remove the Alfred logo.
To do this, go to Alfred Preferences > Appearance > Options, and check the
Hide hat on Alfred window and Hide prefs cog on Alfred window options.
While you’re there, also check the Hide result shortcuts and Hide menu
bar icon, if you want to clean things up even further.
 Alfred Appearance Preferences window.
Theme
Now that we’ve cleaned up the Alfred window, let’s adjust the theme by going to
Alfred Preferences > Appearance > Theme. There are a few additional default
themes, but I’ve created my own that I like (feel free to ignore this bit if
you like the default theme):
 My Alfred Theme. Download the theme →
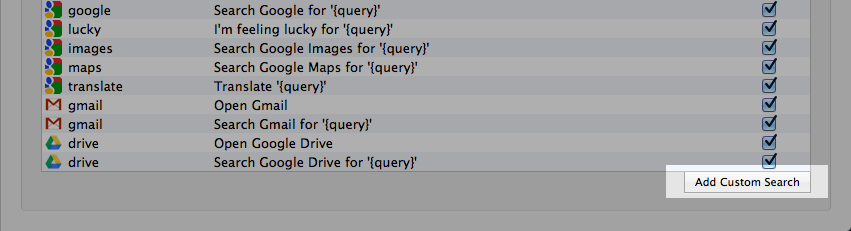
Custom Searches
In addition to the default web searches, you can also created your own custom web searches, which is a really powerful feature of Alfred. You can use it to create a quick keyword shortcut for launching a site you frequent, or hook into a site’s search URL in order to search a particular site directly from Alfred.
 Keyboard Shortcut for Custom Search
 Custom Search with search term.
Adding a Custom Search
Let’s add a custom search by going to Alfred Preferences > Features > Web Search. Click on the Add Custom Search button on the bottom right:
 Add Custom Search button.
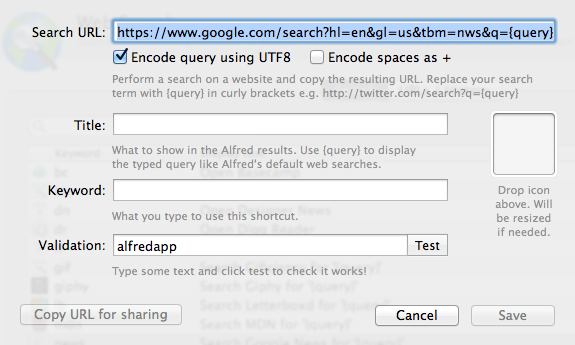
That brings up the panel for adding a custom search:
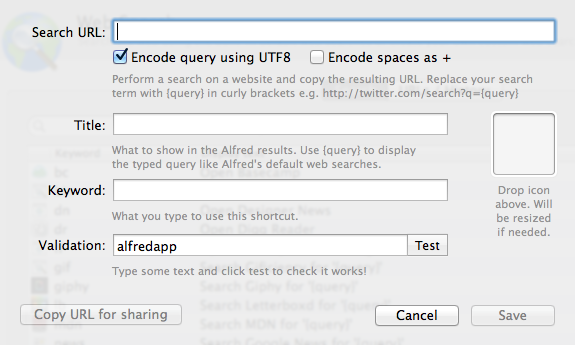 Add Custom Search panel.
Let’s add a custom search of Google News.
1. First, add the URL https://www.google.com/search?tbm=nws&q={query} to
the Search URL field. I found this URL by searching Google News, and then
copying the URL, removing any extraneous information, and replacing the search
term I used that was in the query with the {query} keyword that will be
filled in with whatever search term you type into Alfred.
 Adding the Search URL to the Custom Search.
2. Add Search Google News for '{query}' to the Title field.
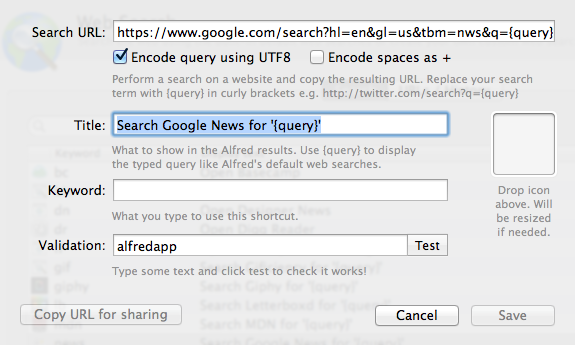 Adding the Title to the Custom Search.
3. Add news to the Keyword field.
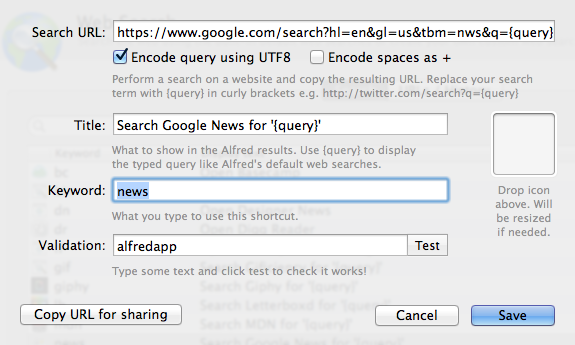 Adding the Title to the Custom Search.
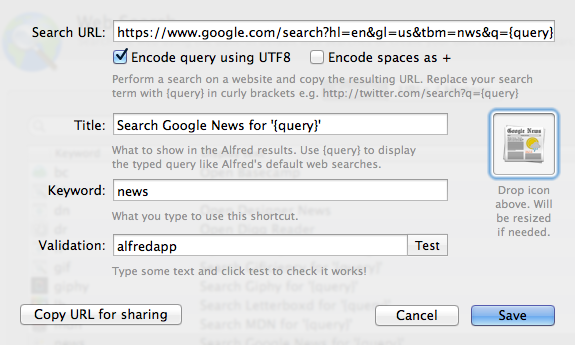
4. Finally, find an image for Google News that you can drop into the
icon placeholder on the right. This is optional, but it makes recognizing your custom search a lot easier when in the Alfred results.
 Adding the Keyword to the Custom Search.
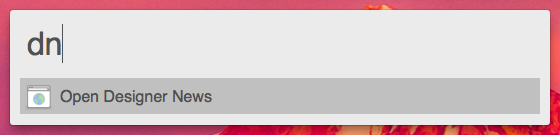
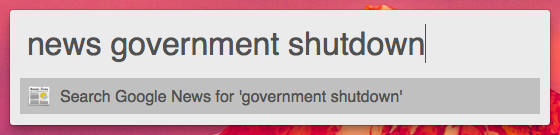
Now, let’s try out our custom search. Bring up Alfred and type news (our
keyword) followed by what you’d like to search for (e.g. ‘government
shutdown’). Your default browser should come up with a page for results of what
you just searched for.
Testing out the Google News Custom Search.
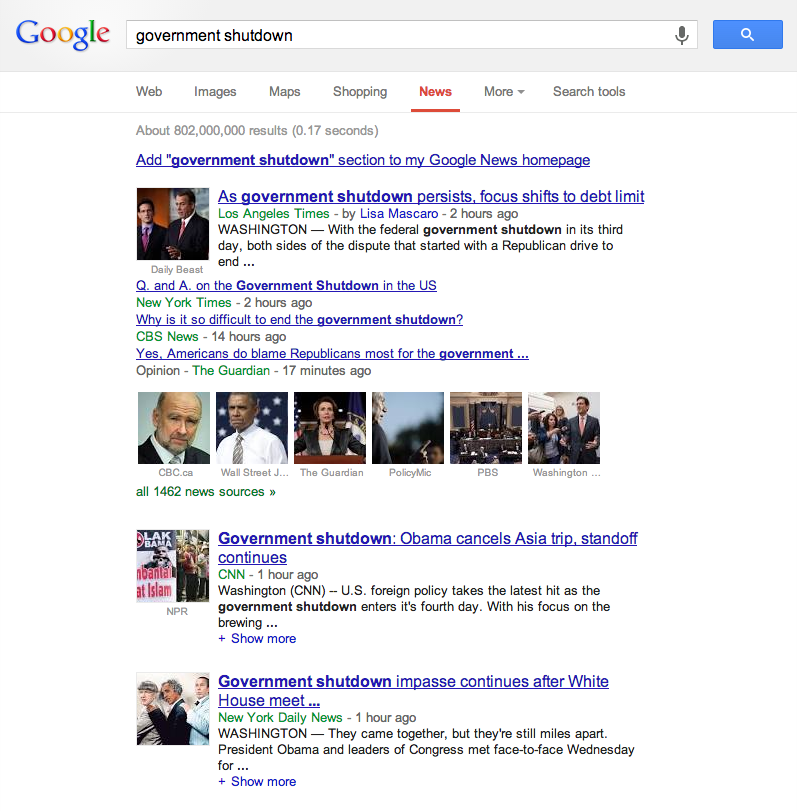 The Google News search results.
Finding Files
Alfred is not limited to finding and launching applications, you can also find and open files, search within a file, and even navigate the file system to find exactly what you’re looking for.
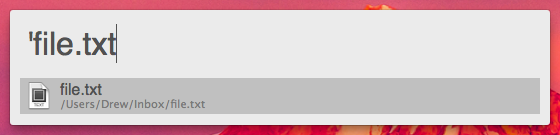
To find a file, bring up Alfred, and either type an apostrophe ' (pressing
space again once Alfred is up adds the ' for you), or type the word find
followed by the filename for the file you’d like to find. Once you find the
file, you can hit enter while it’s selected in the window in order to open it.
 The Google News search results.
Snippets
Alfred gives you the ability to store text snippets. You can add Snippets by
going to Alfred Preferences > Clipboard > Snippets. First, though, let’s set
a keyword for bringing up snippets. Go to Alfred Preferences > Clipboard and
set a Snippet Keyword. I use the exclamation point (!) as my keyword.
 Setting the Snippet Keyword.
Now go back to the Snippets panel and click the + at the bottom right.
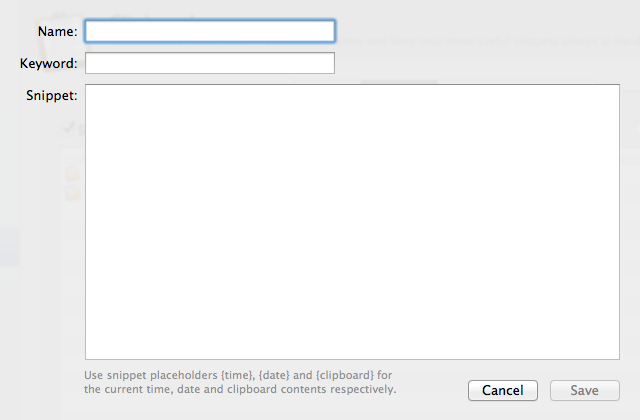 The New Snippet panel.
Add Test, test, and Testing the snippets feature out. as the three
values:
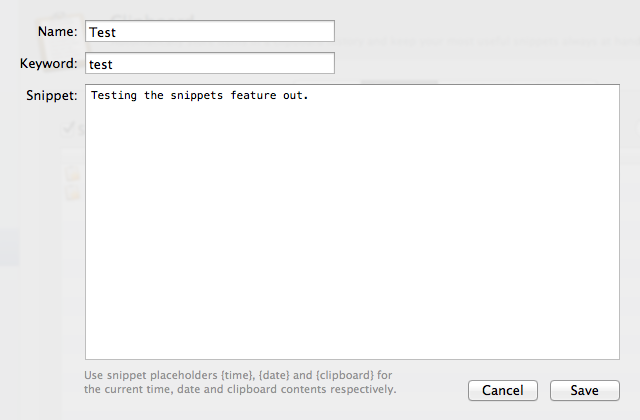 The New Snippet panel values.
Now if you type ! test (our Snippet Keyword followed by the keyword for the
snippet we just created), you’ll be able to paste in the value (‘Testing the
snippets feature out.’) to whichever application is active. If there is nowhere
to paste it, it will be copied to your clipboard.
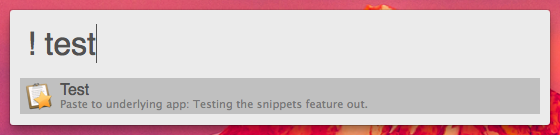 Testing out our new snippet.
Obviously, you’ll want to create more useful snippets for yourself, but this illustrates how you can create your own.
Workflows
The last feature that I want to talk about is Workflows, a feature that was brought to Alfred in version 2.
Create immensely powerful workflows by connecting keywords, hotkeys and actions together to extend Alfred to do amazing things without writing a single line of code! – Alfred Website
The true power of workflows is in their ability to load results directly in the Alfred window. You can set up searches that return results as you type, allowing you to select the result right within Alfred.
Here are a few of the workflows that I use:
- Amazon Suggest by David Ferguson
- Colors v1.41 by Tyler Eich
- Dev Doctor by Syd Lawrence
- A collection of Alfred Workflows for developers by Will Farrell
- Another collection of Workflows by Zeno Rocha
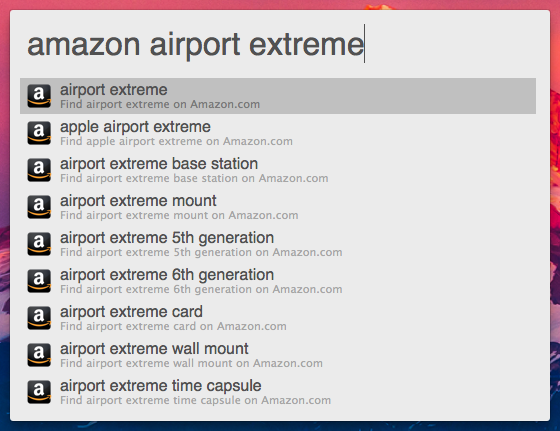 The Amazon Suggest Workflow.
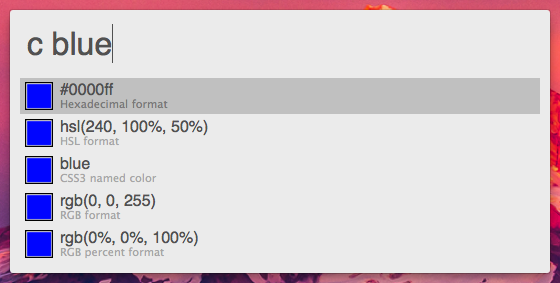 The Colors v.1.41 Workflow.
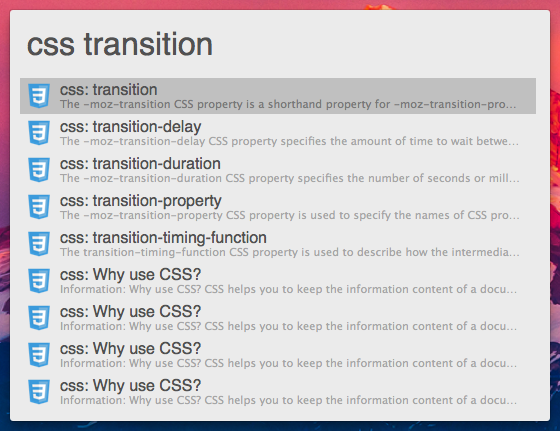 The Dev Doctor Workflow.
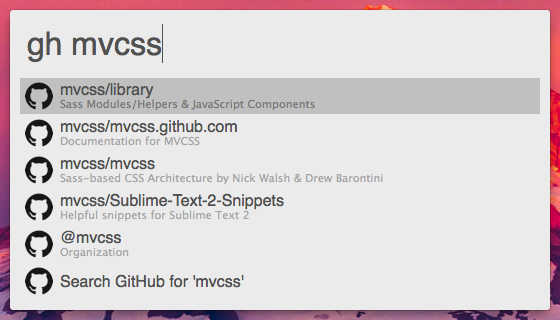 The GitHub Workflow.
That’s All, Folks
That’s it for the primary Alfred setup that I go through each time. Hopefully this helps you improve your Alfred workflow.