In the previous post, “Spreadsheets Can Be Pretty, Too,” we talked about how to make our spreadsheets more visually appealing. In this post, we’re going to do something — at least in my mind — infinitely cooler and more useful. We’re going to publish our spreadsheet to give us the data in JSON, and, from there, consume the JSON with JavaScript to display the data. Let’s do this!
Alright, let’s first take a gander at what we’ll be building. This is the resulting CodePen:
So we’re going to pull the title and rating from our spreadsheet, and use that to build a styled, ranked list of the movies. Let’s get going.
Publishing the spreadsheet
In order to access the spreadsheet’s JSON, we first have to publish it.
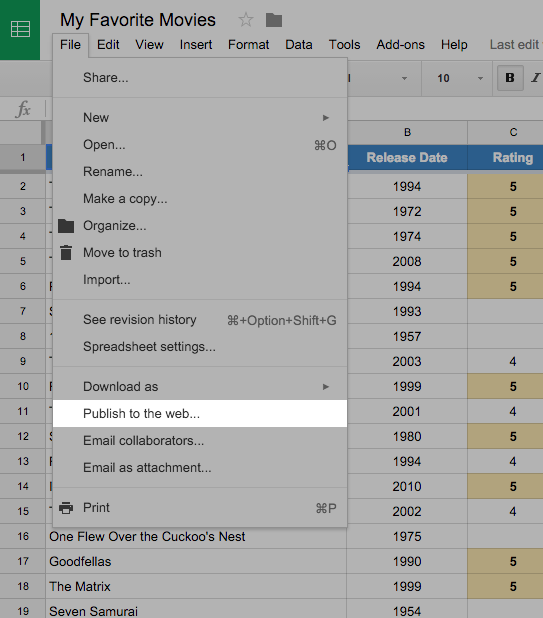
Click on File > Publish to the web… and click Publish.
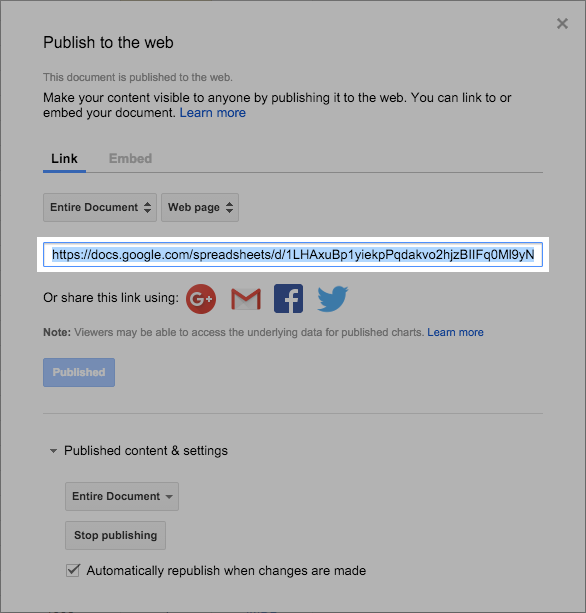
Copy the URL you are given and save it somewhere for now.
Fetching the data
And now that our spreadsheet is published to the web, we can start setting up the JavaScript to fetch the JSON data.
We’re going to be using the ES2015 version of JavaScript.
class Spreadsheet {
  constructor(id, fields) {
    const baseUrl = 'https://spreadsheets.google.com/feeds/list';
    this.url = `${baseUrl}/${id}/od6/public/values?alt=json`;
    this.entry = null;
    this.fields = fields;

    this.loadData();
  }
}
Alright. Let’s talk about what we have so far.
- A
Spreadsheetclass - A
constructormethod with two parameters,idandfields - A
baseUrlvariable - An instance variable on the class for the URL, which uses the
idpassed into the constructor - An instance variable for each
entrywe’re going to asynchronously store - An instance variable for the
fieldsthat are passed in (we’ll see how this works shortly) - A call to an instance method,
loadData()
So now we can fill out our loadData method:
loadData() {
  $.getJSON( this.url, ( results ) => {
    results.feed.entry.forEach( ( entry, index ) => {
      this.entry = entry;
      this.render( index + 1 );
    });
  });
}
Okay, we’re using jQuery here with the $.getJSON method, passing in our URL. For each of the results, we set the instance variable, entry, to each individual entry. And we call a render method, passing in the index of the current entry.
Displaying the data
The render method is used to actually display the data. Let’s take a look at it:
render( index ) {
  let data = {};

  data.index = index;

  this.fields.forEach( ( field, index ) => {
    data[ field ] = this.getEntry( this.entry, field );
  });

  let source   = $( '.js-app-entry' ).html();
  let template = Handlebars.compile( source );
  let result   = template( data );

  $( '.js-app' ).append( result );
}
There’s a lot going on here, so let’s walk through it step by step.
let data = {};
We set an empty object for our data.
data.index = index;
We set the index on our data object to the index that was passed in as a parameter. We’re doing this so that we can properly number our movies list.
this.fields.forEach((field, index) => {
  data[field] = this.getEntry(this.entry, field);
});
So what we’re doing here is making it so we can easily set the data object for each of the fields that we passed in (as an array) in our constructor method. To illustrate, let’s pause and look at how we will call our class:
new Spreadsheet(
  'XXXXXXXXXXXXXXXXXXXXXXXXXXXXXXXXXXXXXXXXXXXX', // The spreadsheet ID hash
  ['title', 'rating'] // The spreadsheet fields
);
The ID here is located within the copied URL during the publishing step. The ID hash of this url (https://docs.google.com/spreadsheets/d/this-is-the-hash/pubhtml) is located where this-is-the-hash is. That is what we will pass into the instantiation of our Spreadsheet class.
The fields we’re passing in are title and rating, which correlate directly to the header columns in our spreadsheet.
data[field] = this.getEntry(this.entry, field);
So, in the first pass of our loop, we’re saying:
data['title'] = this.getEntry(this.entry, 'title');
Now let’s look at the getEntry method:
getEntry( entry, field ) {
  return entry[ `gsx$${ field }` ].$t;
}
This might look weird, but this is just the way that the spreadsheet JSON names the fields.
gsx$title.$tgsx$rating.$t
That is how we access the title and rating data. The getEntry method is a helper to make it a little easier to grab and set up our data object.
And now let’s look at the last part of our render method:
let source = $('.js-app-entry').html();
let template = Handlebars.compile(source);
let result = template(data);

$('.js-app').append(result);
In order to render our data in the page, we’re going to use Handlebars, a JavaScript templating library.
let source = $('.js-app-entry').html();
Here we are grabbing the following chunk of HTML and storing it in source:
<script class='js-app-entry' id='entry' type='text/x-handlebars-template'>
  <div class='movie'>
    <h2 class='movie-title'>
      <b class='movie-title-number'>#{{index}}</b>
      {{title}}
    </h2>
    {{#if rating}}
      <p class='movie-meta'>
        {{#times rating}}
          <img src='codepen/path/to/star.svg' alt='{{rating}} stars' width='24' height='24' />
        {{/times}}
      </p>
    {{else}}
      <p class='movie-meta'>Haven't seen it! 😱</p>
    {{/if}}
  </div>
</script>
The {{title}} and {{rating}} syntax is how we reference the elements that we set up in the data object that we compile with Handlebars.
let template = Handlebars.compile(source);
let result = template(data);

$('.js-app').append(result);
And here we’re compiling our template and appending it into the page at the following spot:
<div class='cell'>
  <h1>IMDB Top <span>250</span> 30</h1>
  <div class='js-app'></div>
</div>
Okay, deep breath. That was a lot of stuff, but hopefully it all made sense. We have one more little change to make in order to show our rating number as the same number of stars.
Adding the stars
In order to add the stars for our rating, we just need to output our rating number as images. And, to do this, we need to create a helper method in Handlebars.
// Credit: http://stackoverflow.com/a/11924998
Handlebars.registerHelper('times', function(n, block) {
  var accum = '';

  for (var i = 0; i < n; ++i) accum += block.fn(i);

  return accum;
});
After a quick Google session, I came across this StackOverflow solution. It creates a times helper function that we can use in our template, which we saw earlier:
{{#times rating}}
  <img src='codepen/path/to/star.svg' alt='{{rating}} stars' width='24' height='24' />
{{/times}}
And there we have it! A rating of “4" will give us four stars!
That’s All, Folks
We built a reusable class for displaying spreadsheet data in any way we see fit. Furthermore, we have an easy method for updating that data, and, with a visually appealing spreadsheet, multiple ways to view the data.